Shanghai JetEdge Cutting Tools Co., Ltd. Loding...

Carbide Inserts for Stainless Steel Machining

Why Stainless Steel Requires a Dedicated Selection Process

Stainless steel is classified mainly within ISO material group M, but ISO M is not one uniform workpiece material. Austenitic, ferritic, martensitic, duplex and precipitation-hardening stainless steels can differ significantly in hardness, strength, ductility, thermal conductivity and work-hardening behaviour.

Insert selection should therefore start with the actual stainless-steel designation, heat-treatment condition and hardness—not only the general description stainless steel.

Typical challenges: work hardening, concentrated heat near the edge, adhesion and built-up edge, long ductile chips, notch wear, burr formation and chipping under unstable or interrupted conditions.

Understand the Stainless-Steel Family

Stainless-steel family Typical machining tendency Selection focus
Austenitic Strong work hardening, high ductility, adhesion and long chips Sharp geometry, reliable chip control, stable feed and directed coolant
Ferritic Machinability varies; adhesion and burrs may still occur Confirm hardness, composition and surface requirement
Martensitic Heat treatment strongly affects hardness and wear Edge strength, toughness and wear resistance
Duplex High strength, work hardening, low thermal conductivity and difficult chips Stable setup, tough grade, controlled heat and chip evacuation
Precipitation-hardening Hardness and interruptions can promote notch wear and chipping Confirm hardness and heat-treatment condition

These are selection tendencies, not cutting-data specifications. Confirm the exact material and condition before production use.

A Reliable Insert-Selection Sequence

Material
grade & hardness
Operation
& target
Stability
& interruption
Insert shape
& geometry
Grade
& coating
Chipbreaker
& edge
Start data
& verify wear

1. Select the Geometry Before Optimizing the Grade

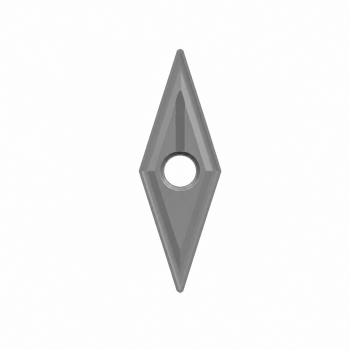
A carbide grade cannot compensate for the wrong geometry. A positive, sharp geometry generally reduces cutting force, heat and built-up-edge tendency. This can help with thin walls, small diameters, low-power machines, weak setups and finishing cuts.

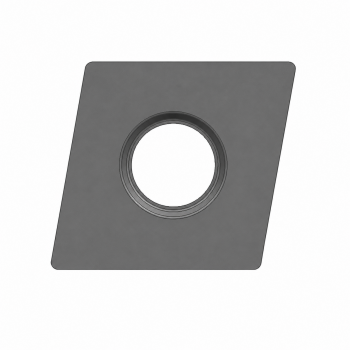
A stronger negative insert, such as a suitable CNMG configuration, provides more edge mass and can be appropriate for general turning and rougher operations, but it normally creates higher cutting forces. The final choice must balance edge strength with process stability.

2. Match the Chipbreaker to Feed and Depth of Cut

A chipbreaker works only within an effective feed and depth-of-cut range. If the chip is too thin to contact the chipbreaker correctly, it may remain long and continuous. If the chip load is excessive, the chip may become too short and repeatedly strike the edge. The objective is controlled formation and safe evacuation—not simply the shortest possible chip.

Operation Chipbreaker direction
Finishing and light cutting Sharp, freer-cutting geometry with control at lower chip thickness
Medium machining Balanced chip control and edge strength
Roughing Stronger edge and larger chip space
Interrupted or unstable machining Reinforced edge, provided cutting forces remain acceptable
Thin walls or slender workpieces Low-force geometry to reduce deflection and chatter

3. Choose Grade Toughness According to Stability

JetEdge's current stainless-steel grade positioning is shown below. Grade selection must still be confirmed with the complete insert shape, chipbreaker, edge preparation, workpiece and cutting condition.

JetEdge grade Coating Intended positioning Selection status
JE6025M PVD Medium machining / general stainless-steel applications JetEdge general starting point for ISO M evaluation
JE6015M PVD Finishing / light cutting Extension positioning; confirm product and application availability
JE6035M PVD Rougher or less stable conditions Extension positioning; confirm product and application availability
Availability note: JE6015M and JE6035M state intended extension positions. They do not confirm stock, universal availability or suitability for every insert model. Contact JetEdge before specifying them in an order.

4. PVD and CVD Are Coating Routes, Not Complete Performance Definitions

PVD coatings are commonly associated with relatively thin coatings, sharper edges and good edge security. They are often useful in stainless-steel machining, finishing and applications where interruption or adhesion resistance matters.

CVD coatings can provide high wear and thermal resistance and may be suitable for stable, productive continuous machining when combined with the correct substrate and edge preparation. Coating route alone does not determine performance. Substrate, coating composition and thickness, adhesion, edge preparation, geometry, material, speed, interruption and coolant must be evaluated together.

There is no technically sound rule that PVD is always better than CVD, or that one coating should be used for every stainless steel.

5. Prevent Work Hardening

Stainless steel can harden when the cutting edge rubs, dwells or repeatedly passes through a previously deformed surface. To reduce the risk:

  • Use a sharp and unworn edge.
  • Avoid dwelling in the cut.
  • Maintain a feed that forms a real chip rather than rubbing.
  • Avoid unnecessary spring passes.
  • Where the setup permits, cut beneath the previously work-hardened layer.
  • Maintain stable engagement and index the insert before it becomes excessively dull.

Reducing feed indiscriminately is not always safe. If feed becomes too low, rubbing can accelerate work hardening and adhesion.

6. Control Heat and Coolant Delivery

Stainless steels generally conduct heat away from the cutting zone less effectively than ordinary carbon steels. More heat can remain near the tool-chip interface, contributing to crater wear, deformation, adhesion and reduced edge strength.

  • Direct coolant toward the cutting zone.
  • Provide sufficient and consistent delivery.
  • Use coolant to support chip evacuation.
  • Avoid intermittent wetting that repeatedly heats and cools the edge.
  • Follow machine, coolant and toolholder supplier requirements.

Coolant cannot compensate for a blunt edge, poor rigidity or an unsuitable chipbreaker.

Stainless-Steel Troubleshooting Table

Symptom Probable cause Corrective direction
Long, stringy chips Chip too thin, wrong chipbreaker or poor chip direction Verify feed and depth of cut against the chipbreaker range; improve coolant direction
Built-up edge Adhesion, rubbing, low effective cutting condition or blunt edge Use a sharper geometry, inspect speed and feed, and apply coolant correctly
Notch wear at the depth-of-cut line Hardened surface, scale, adhesion or repeated pass depth Use a tougher grade direction, vary depth where practical and inspect the surface
Random edge chipping Vibration, interruption, chip recutting or weak clamping Improve rigidity, shorten overhang and inspect chip evacuation
Burrs and poor finish Dull edge, built-up edge, deflection or wrong geometry Use a sharper edge, improve stability and inspect wear
Rapid crater wear or deformation Excessive temperature or mechanical load Review speed, feed, coolant and grade heat resistance
Chatter High cutting force, weak setup, large overhang or unsuitable nose radius Improve rigidity and select a lower-force geometry or suitable radius

Starting Recommendation by Application

Application condition Selection direction
Stable finishing or light cutting Sharp, low-force geometry; evaluate JE6015M extension positioning and availability
General medium machining Start evaluation with JE6025M and a medium stainless-steel chipbreaker
Light interruption JE6025M may remain the starting direction if geometry provides sufficient security
Roughing or unstable interruption Stronger geometry and tougher grade direction; evaluate JE6035M extension positioning and availability
Thin walls or slender parts Positive geometry and controlled nose radius to limit radial force
Hard martensitic or precipitation-hardened material Confirm hardness and application separately; do not select by ISO M alone

Pre-Production Checklist

  • Exact stainless-steel designation, hardness and heat-treatment condition
  • Forged, cast, rolled or previously machined surface
  • External, internal, facing, profiling or grooving operation
  • Continuous or interrupted engagement
  • Toolholder, insert shape and size
  • Machine and workpiece stability
  • Required surface finish and tolerance
  • Coolant method
  • Current speed, feed and depth of cut
  • Expected tool life and current failure mode
Technical boundary: The recommendations above define a selection direction, not universal cutting parameters. Starting data must be chosen from the relevant insert, chipbreaker and grade information and verified under the actual machine, holder, workpiece and coolant conditions. Change one variable at a time and inspect the edge, chips and surface after each controlled test.

Information Required for a Stainless-Steel Insert Review

  • Current insert designation and brand
  • Workpiece stainless-steel grade and hardness
  • Toolholder designation and machining operation
  • Current cutting data and coolant method
  • Cutting stability and interruption level
  • Photographs of insert wear and chips
  • Current problem and expected improvement

Technical References